Showing posts with label christmas. Show all posts

12.26.2011

pumpkin monkey bread


Need or want to score some major brownie points with your family? Then I suggest making this pumpkin monkey bread! I made this Christmas morning for my family and although the process took about 2 1/2 hrs (yikes), it was well worth it because it tastes as good as it looks and everyone was oohing and ahhing :) Don't feel intimated by the process. It's fool proof so long as you follow the directions. Hope everyone had a merry merry Christmas day!

Side note: I adapted the recipe from Tracy of Sugar Crafter and 
changed a few of the ingredients to make it vegan friendly 

What you'll need...

 for the dough:
- 3 1/4 cups flour, plus extra for kneading (I used whole wheat flour, but you can use white as well)
- 1/2 tsp salt
-1/2 tsp cinnamon
- 1/4 tsp nutmeg
- 1/8 tsp ground cloves
- 2 tbsp unsalted butter, melted (I used vegan butter by Earth Balance)
- 1/2 cup warm milk
-1/4 cup warm water
- 2/3 cup pumpkin puree
- 1/4 cup sugar (I used Agave nectar)
- 2 1/4 tsp active dry yeast

for the coating:
- 1 cup sugar (use maple or cane sugar, it's better than refined white sugar)
- 2 tsp cinnamon
- 6 tbsp butter, melted (again, use Earth Balance if you want it vegan friendly)

for the glaze:
- 2/3 cup powdered sugar
- 2 tbsp pure maple sugar
- 1-2 tsp milk (I used organic soy milk)

Do it!:
1. In a large bowl, whisk together the flour, salt, and spices.


2. In another large bowl, whisk together the milk, water, pumpkin puree, melted butter, sugar, and yeast.


3. Make a well in the center of the flour mixture and add in the wet ingredients. Using a wooden spoon, gently stir until the dough comes together. Turn out on to a lightly floured surface and knead until smooth and elastic, about 6-8 minutes. Spray a clean bowl with cooking spray (I used Coconut Oil Spray) and place the dough inside. Cover with a clean dish towel and let dough rise until it doubles in size - about an hour.


4. In the meantime, mix together the cinnamon and sugar, and melt the butter for the coating. Spray a bundt pan with cooking spray. Once the dough has risen, shape the ball into a large rectangle. Using a sharp knife, cut the dough into roughly equal-sized pieces and roll each piece into a ball (I had about 32 pieces, but you may have more or less).


5. Dip each ball of dough into the melted butter and then the cinnamon-sugar mixture, layering them in the bundt pan as you go.


6. Once you’ve used all the dough, cover the bundt pan and let the dough rise again for another hour.

7. Preheat the oven to 350 degrees. Bake the bread until golden brown, 30-35 minutes. Let cool for 5-10 minutes before turning out on to a platter. To make the glaze, stir together the powdered sugar and maple syrup. Pour over the bread while it’s still warm.


8. Optional but highly recommended: Enjoy with a mimosa! See the raspberry face??! 


12.24.2011

crafternoon craft therapy session [4]: bok choy stamped gift wrap


This year I decided to make my own gift wrap (inspiration can be found here) as opposed to using store bought wrapping paper and plastic ribbon because DIY gift wrap is more eco friendly and better for our beautiful Earth, more fun for the receiver to unwrap, creative, pretty, and easily recyclable!

For all my gifts I used the inside of brown paper grocery bags (which are made from recycled paper and easily recyclable themselves and we all have them!) and bok choy as a stamping tool. I love the way the bok choy creates a "rose-like" design! It's purdy! To individualize and jazz things up a bit for each gift, I used glitter, yarn, pom pom balls, twine, diy snowflakes, and paint pens. 


[decorating paper grocery bags with bok choy "stamps"]

[embellishing brown grocery bag made gift tags using martha stewart brand glue pen and glitter]


You will need: 
- brown paper bags
- scissors
- tape
- paint 
- art tray for the paint (I used the lid of a coffee container)
- bok choy or celery stock base (You will need to have cut this as smoothly as possible to leave a nice straight stamping surface)
- yarn, twine, or ribbon if you have it already (non-plastic)
glue pen (for gift tags)
- fork (to make mini pom pom balls). Tutorial for the pom pom balls can be found here
- hole punch

Do it!:
1. Cut open a brown paper bag so that it lays relatively flat.
2. Put paint (I used red but use any color you want) onto your tray (you may need to brush it around so that it's not all in one lump).  Take your prepared bok choy or celery stamp and dip it into your paint.  Check and be sure that it's fully coated.
3. Carefully press your stamp down onto your paper with steady even pressure.
4. Repeat as desired all over the paper.
5. After the "roses" dry you may want to free hand paint on green leaves to complete the "rose" look. I did this only on a few stamps. 
6. Allow paper to dry completely and then wrap up your gifts.
7. Embellish as you like!  


  Do you make your own gift wrap?! Do you use a theme when wrapping gifts?

12.22.2011

sisterly love is all around

Sisters are forever friends. For when three sisters love each other with such sincere affection, the one does not experience sorrow, pain, or affliction of any kind, but the other's heart wishes to relieve, and vibrates in tenderness... like a well-organized musical instrument.
~ Elizabeth Shaw

 [top: my older sister Sierra's daughter Eden; me with Eden; me, Sierra, Eden, and my younger sister Lauren]


12.16.2011

while visions of "holiday sweets" danced in their heads

[collage for one life in stills]
[collage for one life in stills]

Here are some merry and irresistible mouth-watering holiday treat recipes ideal for christmas parties, gifts, yourself, and the big guy (Saint Nicolas duh!):

1. Melted Snowman Cookies - via Crazy Domestic

2. Festive Holiday Caramel Pretzels - via Squidoo

3. Etched Hot Cocoa Jar - via Oopsey Daisy, creative gift for your friends and family!

4. Cranberry Pistachio Dark Chocolate Bark - via Skinny Taste, healthier option than traditional peppermint bark, cheaper, and only takes three ingredients to make! Sold!

5. "Egg" Nog Smoothie - via Oh She Glows, vegan, creamy, and healthier than the classic version has me going HO HO HO! corny? that's me.

6. Peppermint Lollipop Cupcakes - via Munchkin Munchies, These are almost to cute to eat! Who am I kidding? I want to nom nom nom on some right now!

7. Holiday Cocktail - via What Katie Ate, jolly good cocktail using cranberry juice, apple juice, vodka, and ginger ale! 

8. Sea Salt Caramels - via Judicial Peach, ...and my mouth is watering. Would it be too much to cover these suckers in dark chocolate? I think not.

9. Dipped S'mores - via Tip Junkie

10. Red Velvet Brownies - via Our Footprints, OH MY GAWD! I'm making these ohhhh yeah.

Merry baking!

12.09.2011

this and that

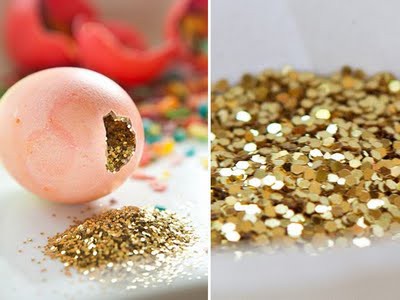
[image via cstar events]

I'm storing this idea in the "fun party ideas" section of my brain. These would be perfect for Easter, birthdays, and even New Years!


Tuesday night was spent chasing Santa Claus through the neighborhoods so the kids (and I) could sit on his lap (I refrained from doing this) to tell him what we want for Christmas. We also made beautiful gingerbread houses using gumdrops, peppermint pinwheels, m&m's, smarties, jelly beans, and sugary frosting for snow... all while listening and singing to the Christmas genre station on Pandora. Love me some Pandora! Oh, and I bet our gingerbread houses are more personalized than yours! Geneva built a mailbox on her house and Christian and Nicolas built dandelions (they are fascinated by dandelions ever since I showed them one the other day) and candy bushes and trees.  


Sneak peak at one of the many handmade or hand painted gifts I'm giving friends and family this Christmas! I used Pebeo Porcelaine 150 outliner paint on porcelain mugs from CB2
Do it!: 
1. make sure your mug is clean and dry.
2. paint whatever design you want! (i'm personalizing each mug based on the person I'm giving it to).
3. once you've finished painting, let it dry for 24 hours.
4. bake your mug for 35 minutes at 300 to 325 degrees F. 
5. after baking, turn off the oven and leave the mug inside until it has gradually cooled to room temp.
6. mug is now dishwasher safe with a rad design! drink up folks!

[images via society 6]

If you're an art enthusiast, into creative designs and juxtapositions, or want a cool sight to browse through on your lunch break, check out Society6! They have really sweet artwork created by thousands of artists from around the world! Find a print you like? Get it framed, put on an iPhone case, laptop skin, t-shirt, or sweatshirt! The possibilities are endless. I personally LOVE the "Scales" iPhone cover designed by Steven Womack and the "Whimsical Balloons" laptop skin designed by Laura Ruth!

[image via pinterest]

Made some the other day except I used shelled pumpkin seeds from the bulk bins at Whole Foods. 
Do it!: 
1. put about a cup of shelled pumpkin seeds in a ziploc bag and pour 1 tbsp. of olive oil and 1/2 tbsp. soy sauce into the bag. 
2. shake the bag until the seeds are covered with oil and soy sauce.
3. line a baking sheet with parchment paper and evenly spread the seeds on the sheet.
4. bake the seeds at 400 degrees F for 5 to 6 minutes. Don't overcook because the seeds brown easily!!
5. Let cool for 5 minutes.
6. Enjoy as a snack on its own, on salads, fish, greens, and rice!

nom nom nom!