Showing posts with label diy. Show all posts

1.20.2012

pinterest picks: all things turquoise

Turquoise is definitely my power color, or stone if you will. It emanates power and energy and makes me feel pretty, excited, and full of YEAH's! I love anything turquoise. Let that be known. Check out my collage of everything turquoise below (all images via pinterest)! 

What colors make you feel happiest?


Anthropologie - On-Your-Toes flats; Love the tiffany blue toe cap. Possibly DIY-able?

Turquoise Triangle Ring; I want want want this as my wedding band one day. Attention future husband...take note!


Greece or heaven? You be the judge. 

Rock Candy recipe


Incorporating turquoise color into wedding decor

Turquoise Braided Necklace; DIY tutorial here

Turquoise Cabinet; lovely accent to any space


12.24.2011

crafternoon craft therapy session [4]: bok choy stamped gift wrap


This year I decided to make my own gift wrap (inspiration can be found here) as opposed to using store bought wrapping paper and plastic ribbon because DIY gift wrap is more eco friendly and better for our beautiful Earth, more fun for the receiver to unwrap, creative, pretty, and easily recyclable!

For all my gifts I used the inside of brown paper grocery bags (which are made from recycled paper and easily recyclable themselves and we all have them!) and bok choy as a stamping tool. I love the way the bok choy creates a "rose-like" design! It's purdy! To individualize and jazz things up a bit for each gift, I used glitter, yarn, pom pom balls, twine, diy snowflakes, and paint pens. 


[decorating paper grocery bags with bok choy "stamps"]

[embellishing brown grocery bag made gift tags using martha stewart brand glue pen and glitter]


You will need: 
- brown paper bags
- scissors
- tape
- paint 
- art tray for the paint (I used the lid of a coffee container)
- bok choy or celery stock base (You will need to have cut this as smoothly as possible to leave a nice straight stamping surface)
- yarn, twine, or ribbon if you have it already (non-plastic)
glue pen (for gift tags)
- fork (to make mini pom pom balls). Tutorial for the pom pom balls can be found here
- hole punch

Do it!:
1. Cut open a brown paper bag so that it lays relatively flat.
2. Put paint (I used red but use any color you want) onto your tray (you may need to brush it around so that it's not all in one lump).  Take your prepared bok choy or celery stamp and dip it into your paint.  Check and be sure that it's fully coated.
3. Carefully press your stamp down onto your paper with steady even pressure.
4. Repeat as desired all over the paper.
5. After the "roses" dry you may want to free hand paint on green leaves to complete the "rose" look. I did this only on a few stamps. 
6. Allow paper to dry completely and then wrap up your gifts.
7. Embellish as you like!  


  Do you make your own gift wrap?! Do you use a theme when wrapping gifts?

12.12.2011

diy holiday gift wrap ideas

This year I'm going down the eco-friendly gift wrap path by using brown paper grocery bags (which are made from recycled paper and easily recyclable themselves) instead of the usual wrapping paper and plastic ribbon. To jazz things up a bit (because a gift that's wrapped in just brown paper bags can be kind of boring) I'm going to use paint, yarn, tape, glitter, craft scraps, twine, etc... to get creative with decorating the paper wrapping!

This is a great way to be conscious, green, AND creative for the holidays!

Click on the links below for tutorials on how to create these simple gift-wrap decorating ideas!


1. Word Puzzle Wrapping Paper - via The Die Line - Instead of buying the wrapping paper, make your own word puzzle by using letter stamps then circle the holiday or the name of the person receiving the gift!

2. Washi Tape Wrapping Paper - via Poppy Talk

3. More Washi Tape Decorating


4. Easy Printmaking Using Block of Wood and Yarn - via Modern Parents Messy Kids

5. Paper Scraps + Celery as a Stamping Tool - via Creature Comforts - This idea is probably my favorite! I love the tags and the pattern (flower-esque) the celery makes!

6. Typographic Gift Wrap - via Man Made - Fantastically simple!


7. Doily Gift Tags - via Pinterest - Buy packs of doilies at the dollar store then cut and glue away!

8. Easy Styrofoam Printing on Paper or Fabric - via Alisa Burke  

9. Gift Wrap Ideas Following a Yellow Color Palette - via Decor8 - she used grocery bags and carefully selected colors and decor items such as: doilies, opaque white ink pen, ribbon, lace, fabric measuring tape, bakers twine, and washi tape!

Happy Creative Wrapping!

12.09.2011

this and that

[image via cstar events]

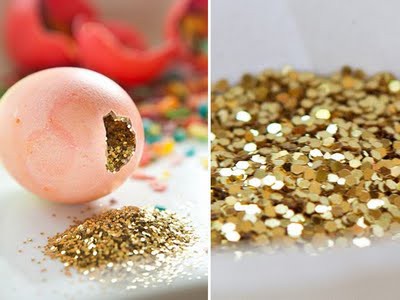
I'm storing this idea in the "fun party ideas" section of my brain. These would be perfect for Easter, birthdays, and even New Years!


Tuesday night was spent chasing Santa Claus through the neighborhoods so the kids (and I) could sit on his lap (I refrained from doing this) to tell him what we want for Christmas. We also made beautiful gingerbread houses using gumdrops, peppermint pinwheels, m&m's, smarties, jelly beans, and sugary frosting for snow... all while listening and singing to the Christmas genre station on Pandora. Love me some Pandora! Oh, and I bet our gingerbread houses are more personalized than yours! Geneva built a mailbox on her house and Christian and Nicolas built dandelions (they are fascinated by dandelions ever since I showed them one the other day) and candy bushes and trees.  


Sneak peak at one of the many handmade or hand painted gifts I'm giving friends and family this Christmas! I used Pebeo Porcelaine 150 outliner paint on porcelain mugs from CB2
Do it!: 
1. make sure your mug is clean and dry.
2. paint whatever design you want! (i'm personalizing each mug based on the person I'm giving it to).
3. once you've finished painting, let it dry for 24 hours.
4. bake your mug for 35 minutes at 300 to 325 degrees F. 
5. after baking, turn off the oven and leave the mug inside until it has gradually cooled to room temp.
6. mug is now dishwasher safe with a rad design! drink up folks!

[images via society 6]

If you're an art enthusiast, into creative designs and juxtapositions, or want a cool sight to browse through on your lunch break, check out Society6! They have really sweet artwork created by thousands of artists from around the world! Find a print you like? Get it framed, put on an iPhone case, laptop skin, t-shirt, or sweatshirt! The possibilities are endless. I personally LOVE the "Scales" iPhone cover designed by Steven Womack and the "Whimsical Balloons" laptop skin designed by Laura Ruth!

[image via pinterest]

Made some the other day except I used shelled pumpkin seeds from the bulk bins at Whole Foods. 
Do it!: 
1. put about a cup of shelled pumpkin seeds in a ziploc bag and pour 1 tbsp. of olive oil and 1/2 tbsp. soy sauce into the bag. 
2. shake the bag until the seeds are covered with oil and soy sauce.
3. line a baking sheet with parchment paper and evenly spread the seeds on the sheet.
4. bake the seeds at 400 degrees F for 5 to 6 minutes. Don't overcook because the seeds brown easily!!
5. Let cool for 5 minutes.
6. Enjoy as a snack on its own, on salads, fish, greens, and rice!

nom nom nom!


11.29.2011

advent calendar- 12 great ideas for diy

December 1st is right around the corner! Holiday tunes are jamming on station 103.5, Saint Nicholas and his helpers - a.k.a. Manhattan Beach Police Enforcement- is cruising through the neighborhoods (saw him tonight on Marine and Highland Ave!),  sightings of Christmas trees strapped to the roofs of cars are more and more abundant, and each night there's another house illuminated with beautiful Christmas lights!

To spread the cheer and commence the countdown to Christmas, I thought I'd share with you 12 creative ideas for making your own advent calendars! I hope you find one you like and try and recreate it! I've got my eyes set on #8!

[collage for one life in stills]

1. Advent Calendar using coffee cups - via Living at Home, photographed by Julia Hoersch
2. DIY Advent Calendar using potted plants - via The Feminist Housewife
3. Merry Bundle of Bags Advent Calendar - via Martha Stewart
4. DIY Magnetic Holiday Advent Calendar - via Twig and Thistle 
5. Hanger Advent Calendar - via Fryd + Design
6. Scrap Wood Christmas Tree Advent Calendar - via Summersville


[collage for one life in stills]


7. Starry Trees Advent Calendar - via Julie Marie's Etsy Shop
8. Advent Calendar using food cans- via House to Home
9. Advent Calendar using matchboxes - via Country Living, photographed by Victor Schrager
10. Advent Calendar using an old frame - Fiskars Crafts, designed by Becky Novacek
11. Advent Tree - via Sunset, photographed by Thomas J. Story
12. Advent Calendar activities - via All Things Simple

11.10.2011

crafternoon craft therapy session [3]: hand painted gifts

[hand painted porcelain mug. jazz up a plain white mug with a cool design and give as a gift!]
[glass jar typography. great idea for party favors, weddings, and labels! you could also attach wire or twine to the jars and hang in trees with tea light candles or flowers]
[paint a mustache on a mug for a silly and fun gift!]
["love me" plate using red porcelain pen. sweet gift for that special someone on a special day, or any other day for that matter :)]


hand painted porcelain 
    what you'll need:
  • porcelain mug, plate, picture frame (anything that's porcelain will work)
  • porcelain paint pen (Pebeo Porcelaine 150 outliner from dick blick) 

    do it!:
    1. Make sure your mug is clean and dry.
    2. Paint your design! If you mess up just wipe the paint away with a wet paper towel. Some porcelain   paints are not recommended for surfaces that come in contact with food. So just to be safe, don’t paint the inside of your mug! 
    3. Once you’ve finished your masterpiece let the paint dry for 24 hours. Then, bake your mug according to the paint package instructions (its usually bake in oven at 300 degrees for 30 minutes). After baking turn off the oven and leave the mug inside until it has gradually cooled to room temperature. After you bake it the paint is dishwasher safe.


glass jar typography
     what you'll need:
  • glass jar (yogurt, mason, jam, baby food, etc...) or vase
  • wire (if you are going to hang them)
  • wire cutter
  • very fine paint pen for glass (found at your local craft store)
  • tape
  • a list of your guests names (or what you wish to write on the jar) printed out

     do it!:
    1. Make sure your jars are clean and dry.
    2. Tape the name you wish you draw on the inside of the jar. 
    3. Trace the name on the glass with your fine paint pen
    4. Remove the paper and make any necessary touch ups.
    5. Add some flowers to the jars and display them on a table (beautiful) or add some wire around the lip of the jar to hang it. Voila! 


10.30.2011

halloweenie 2011


[shane as the white swan and me as the black swan]

[hoover as wildred and sarah as an indian]

this year I decided to dress up as Black Swan for Halloween! to complete the look, i needed to find someone to be my alter ego, the white swan. luckily, one of my best guy friends jumped on being the White Swan and called dibs less than one minute after making a request on Facebook. gotta love Shane Gallas. 

before hitting the dance floor ballerina style friday night, we needed to make and put together our costumes. shane wore white tights, a white tutu, a SUPER deep white v-neck shirt from american apparel. and a feather head piece i made for him (basically icing on top of the swan cake)! i wore pink tights, ballet shoes, a black leotard and tutu, a crown i spray painted black, and a black bra over the tutu i covered with feathers using a hot glue gun. to finish the look, i used water proof eye liner and gold eyeliner for my black swan eye decals. 

...and voila! the swans are born!

other stand-outs i saw friday night night: Hoover as Wildred from the FX show "Wildred, a guy dressed up as a mammogram (wish I had a picture), a group of my guy friends dressed up as robots (full on robot suits), Mike Masenga as a Ghost Buster, and plethora of zombie brides. 

on actual Halloween I'm planning on keeping it mellow by playing board games at Alex Curry's house and passing out candy. Happy Halloween ya'll! What are you dressing up as? Are their aspects of your costume you made?

9.30.2011

crafternoon craft therapy session [2]: black and gold chevron tray

Wednesday night I went over to my gal pal Alex Curry's house for our second craft therapy session! Alex scored some awesome crafts from Michael's to paint and decorate a wooden tissue box cover. Unfortunately, I don't have any pictures of her craft, but it was super duper rad and totally her style! Check out her blog here. She should be posting pics of it soon. Inspired by a post I found here on Pinterest, I decided to glamify (new word created by yours truly) an old tray I bought from Cost Plus eons ago (ok, not eons. maybe like 5 years ago when I was attending UC Santa Cruz). 


[all photos for one life in stills]
Materials: 
  • Tray (laptop support tray, food tray, or any time of decorative tray. The tray I used had a japanese inspired design painted on it before I spray painted it black). 
  • Krylon spray paint in black and metallic gold found here and here
  • 1" blue painters tape found here.  


DO IT!: 
  1. Spray paint the entire tray front and back with your first color (I used black). 
  2. Let paint dry overnight! I didn't do this and the black paint came right off with the tape revealing the original design. In the end, I actually liked my oopsy because it gave the tray a vintage and used feel. :) 
  3. Place painter's tape on the board in the design you desire (I opted for a chevron design). 
  4. Spray paint your second color (I used metallic gold) over the exposed first color. You may want to do a second coat for a more finished look. Your choice, crafters! 
  5. Let dry (approx. 30 minutes) then carefully pull the tape off to reveal your new, beautiful totally wicked tray!


There would not have been a successful craft therapy session without a delicious and nutritious gluten free and vegan friendly meal! We made spaghetti squash lasagna for dinner and vanilla flavored coconut milk yogurt with granola and fresh berries for dessert! Recipe and pictures coming soon! :)


Happy crafting you fine crafters!

9.26.2011

crafternoon craft therapy session [1]: melted crayon art

I love worship arts and crafts so much so that I would change my name to Shelby Iloveartsandcrafts Stillians if I could. You think I'm kidding, but I'm not. According to craft therapy (and I totally agree) reserving time for arts and crafts in your life reduces stress and offers an opportunity for self expression by getting your creative juices flowing. Yum! I'm a bonafide arts and crafter which means I try to dedicate at least one night a week to arts and crafts. Not only do I go to sleep feeing a little brighter, I wake up with a new rad craft I can either wear, hang on the wall to spruce up a space, or send to a friend to.

Last week I was inspired by the melted crayon art photos on Mr. Kate by Kate Albrecht! How freaking awesome does the end product look??! The cool thing about this craft is that anyone can do it (there's only 4 materials needed!) and it'll take you less than 30 minutes to craft. Yay!

Materials:

  • a white canvas
  • crayola crayons (they tend to melt better than rose art crayons. I bought 3 packs of 24 classic crayola crayons at target for $2 a pop)
  • hot glue gun
  • blow dryer


Do it!:

  1. pick the colors you want to use (i used every color except brown, gray, and black) and arrange them on the floor in whatever design you're feel in'.
  2. hot glue the crayons on your canvas with tips pointing down (i chose to glue the crayons side-by-side on the top of my canvas but you may like something more like this
  3. heat the crayons with a blow dryer set to hot and high and watch the crayons do their thing!


And remember, with arts and crafts, there is no such thing as right or wrong. The process, rather than the end result, is paramount.

Happy crafting!